如何批量创建AD用户

How to create Bulk Users in Active Directory using PowerShell
原文已删除,这是通过我的历史书签以及网络缓存重新获取的。
Let’s say in your organization, you want to add new Active Directory users. To create users, you can use the user creation wizard in Active Directory Users and Computers. What if you need to create more than 10,000 users? It will take a long time if you do it yourself. In this article, you will learn how to use PowerShell to create bulk Active Directory users from a CSV file. This is necessitated by the fact that, as a system administrator, your aim should always be to save time by automating some processes and tasks. When done manually by using the graphical user interface, creating Active Directory accounts is boring, repetitive, and time-consuming. And who has the time to manually create a large number of AD accounts?
For instance, it takes one minute to create a new user with the wizard. It will take one minute for every user. What if you have to add ten thousand new users? Mathematically, 10,000 users * 1 minute equals 10,000 minutes. That is approximately 160 hours. A bit too much time to spend on creating new users, right? What if you could automate the process and do it much faster in time? Simplifying the task of creating bulk users in Active Directory is what you will be able to do at the end of this tutorial.
What is Active Directory (AD) – It is a Microsoft Directory Service that runs on Windows Server and allows administrators to manage network permissions and access. Data in Active Directory is stored as objects. A single element, such as a user, group, application, or device, such as a printer, is referred to as an object.
Prerequisites:
- PowerShell Active Directory Module loaded – The script provided in this article will load the module you just need to run it from a computer that has RSAT tools installed or the AD role.
- Rights to create users accounts in Active Directory
- Prepared CSV File and PowerShell Script
Creating Bulk AD User using PowerShell
Importing bulk AD users is simple and very interesting. In this guide, I’ll walk you through the process of creating bulk ad accounts step by step but before then, we need to first create a template in CSV format.
Setup the CSV file
A basic CSV file should have the following headers. Technically you can import new accounts with just the FirstName, LastName, OU, Username and the Password column but in most cases you may need the additional details. So in our CSV File, we have included the additional fields such as, Email, StreetAddress, City, ZipCode, State, Country, Department, Telephone, JobTitle and Company as shown below.
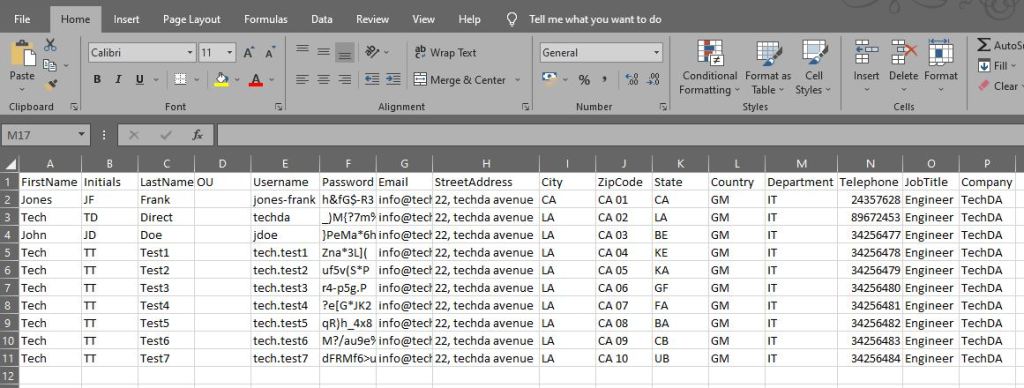
The first and last names are the most important pieces of information we require.
In real-life scenarios, it is more recommended to create the CSV file and send it to a HR/Admin department to input other details aside Password and OU field, and then you cross-check it before executing it.
Why should you tell the HR/Admin team to leave the OU and that?
- Password field, leaving it empty because the IT department will create the passwords. Even if it’s a temporary password. When the user logs in, a prompt will show up to change the password.
- OU field, leaving it empty because the IT department will fill in the Organizational Unit (OU). That’s where the new Active Directory (AD) Users are going to be created.
You will need to locate and add the Organization Unit (OU) path. Follow the steps below to find the path.
Create OU in AD
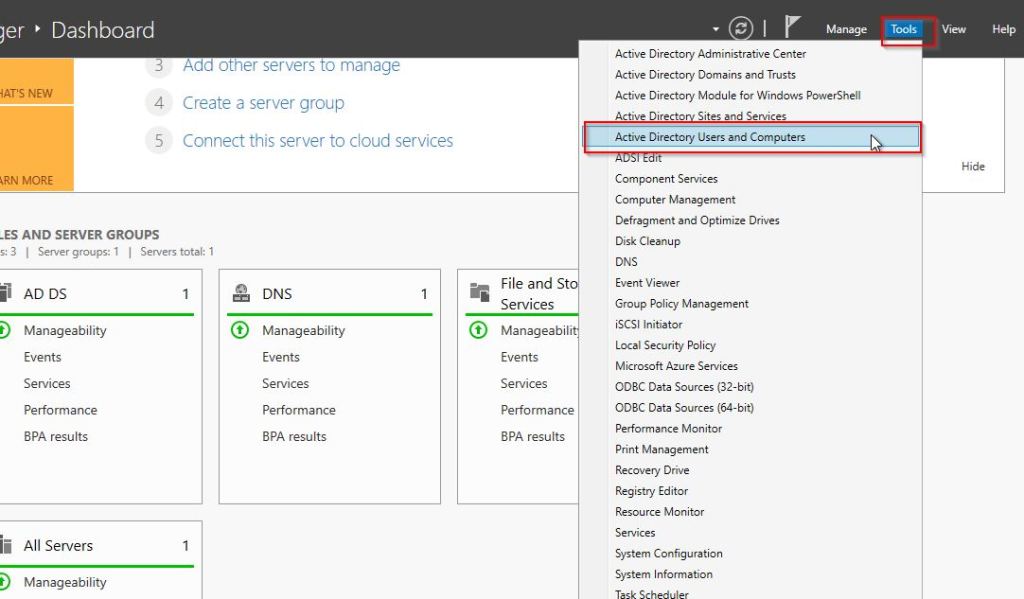
To create an OU, from server manager locate “Tools” and upper side of the server manager dashboard and click on Active Directory Users and Computers
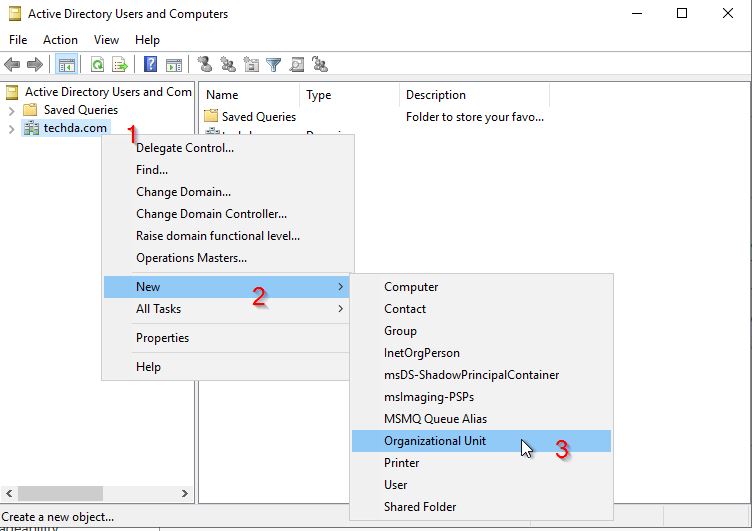
Next, right-click on your server domain name
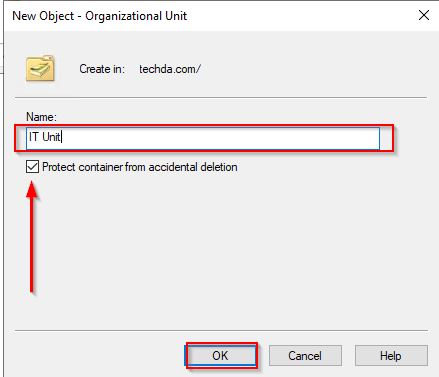
Finally, enter a unique name for the OU. You can check the box “Protect container from accidental deletion” and click Ok.
How to find the OU path
To locate the OU path, start Active Directory Users and Computers (ADUC) and make sure Advanced Features is enabled. Click the View menu, then Advanced Features. Now that Advanced Features is enabled, you will be able to locate the **Attribute Editor** tab under the OU’s property.
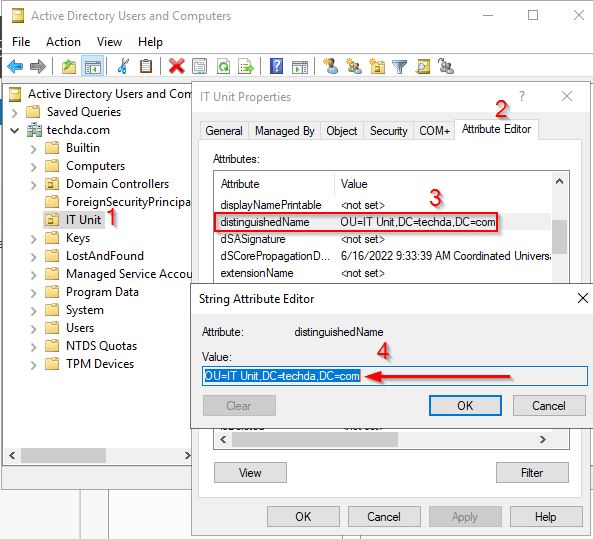
Right-click the OU with the name IT Unit and click Properties. Click the tab Attribute Editor. Find the attribute distinguishedName. Double-click on it and copy the value. The value in my OU is OU=IT Unit,DC=techda,DC=com.
The distinguishedName attribute is the OU path. We can see in the CSV file that the users are going to work in the IT department. Here, we copy the attributes of the “IT Unit” OU to CSV file.
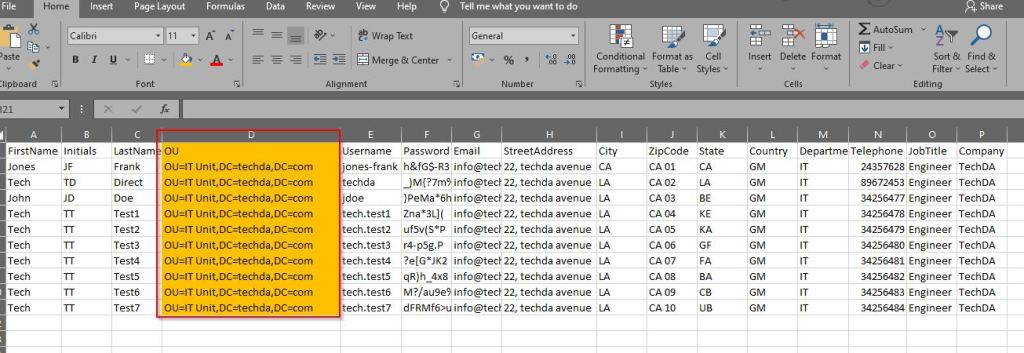
Place the value in the fields under the OU’s column as shown above.
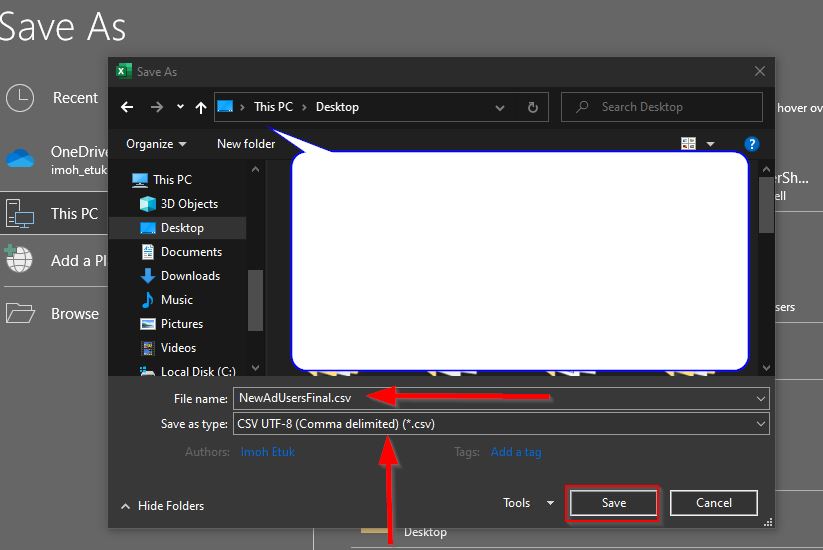
When you’re finished, save it as a new CSV file. Navigate to File and select Save As. Name is as NewAdUsersFinal.csv. It should be saved as CSV UTF-8 (Comma delimited) (*.csv). Save by clicking the Save button.
Place the NewAdUsersFinal.csv in the C:\Temp folder on the Domain Controller or the Management Server.
Checking the CSV file
Import the CSV file into PowerShell before running the script. It’s a great way to see if it’s readable and if everything is in order. Is the delimiter in the CSV file a comma or a semicolon? If you’re going to use the PowerShell script in the next step, you should be aware of this. If you use the semicolon as a separating character in your CSV file, add the delimiter parameter -Delimiter “;” to your Import-Csv cmdlet.
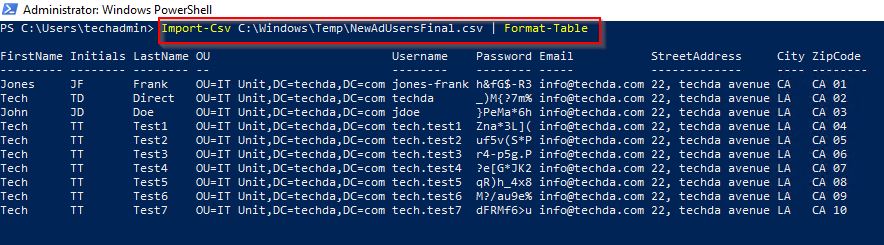
PowerShell should be run as administrator. To read the CSV file, use the Import-Csv cmdlet. Remove the -Delimiter parameter if it cannot read the CSV file. The format below appears when run with Delimiter parameter.
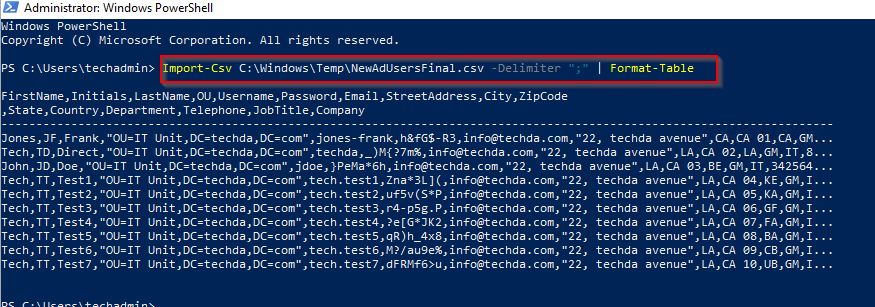
The command will be Import-Csv C:\Windows\Temp\NewAdUsersFinal | Format-Table and the output will look like the one below:
Configuring the Add-NewUsers PowerShell script
Copy the Add-NewUsers.ps1 script below and save it in path C:\Scripts on the Management Server or Domain Controller.
提醒: 如果将AzureAD反向同步到AD,实际上无法同步的。需要将AAD下载下来,对比姓名,UPN,邮箱信息。之后AAD Portal/Admin 365 Center就会更新为同步状态。
1 | # Import active directory module for running AD cmdlets |
You can modify the script file by copying and pasting it in your favorite IDE.
As shown above, line 5 is the path of the CSV file. Change the path if you place the CSV file in another path. In our demo, it’s C:\Windows\Temp\NewAdUsersFinal.csv. Don’t modify it if your own path is the same with the one we have here. > In the same line 5, remove the -Delimiter parameter if you have a coma separating character instead of semicolon in your CSV file. In our demo, it’s the coma separating character.
Line 8 is the UserPrincipalName (UPN). Change the UPN to yours. In our example, it’s techda.com.
When you are save the script.
Running the Add-NewUsers.Ps1 PowerShell script
Create a folder called “Scripts” in the C:\ of your Management Server or Domain Controller. and save the script file it in the path C:\Scripts.
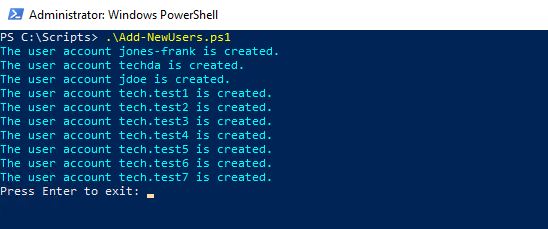
Now in the PowerShell console, change the directory path to C:\Scripts\ and run the script Add-NewUsers.ps1. The script will run and create Active Directory users in bulk. When done, press Enter to exit the screen.
If the user already exists in AD, you will see the following:
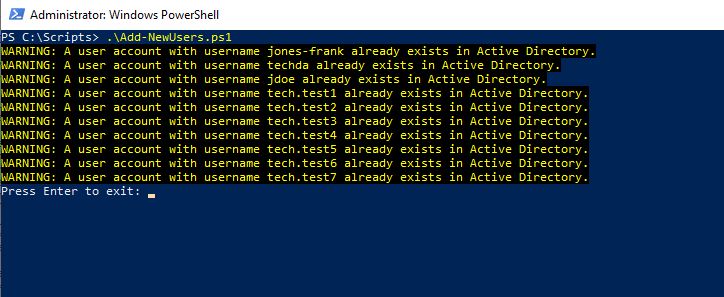
AD-Users Already Exist
Alternatively, you can run the script using PowerShell ISE console. To do so, run PowerShell ISE as an administrator and then copy and paste the script in the console.
To Run it just click the green button..
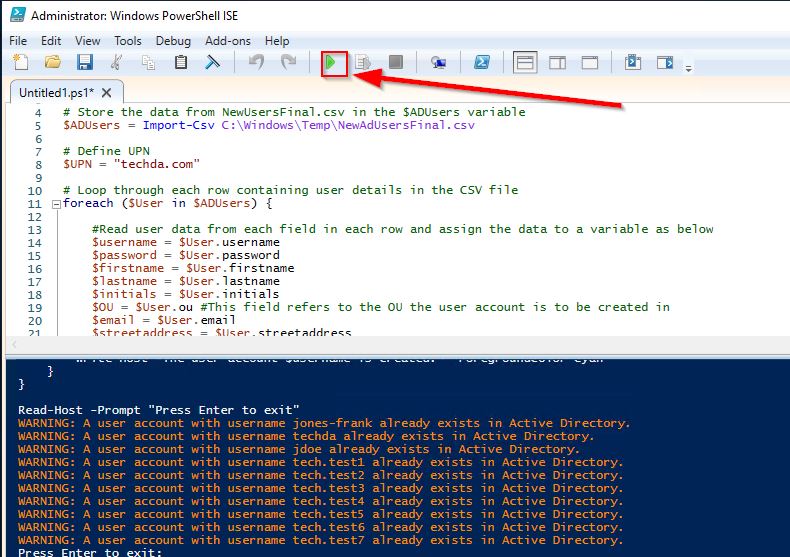
As shown above, the report is the users are already been created.
Now let’s take a look in Active Directory Users and Computers. The users are created successfully in the OU.
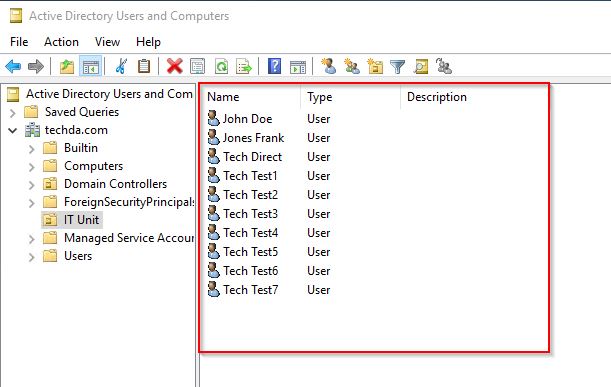
Clicking on each username will display the full details about the user.
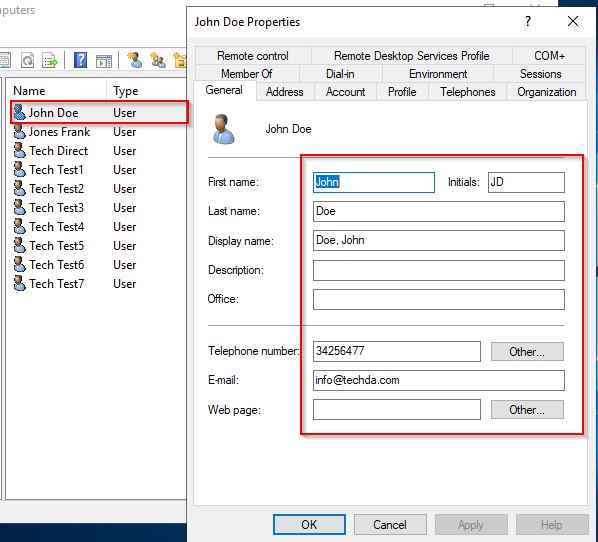
Ad-User’s details
Take your time to navigate the tabs to additional information like the Address, Account and Organization.
In summary, You learned how to use PowerShell to create Active Directory Users from CSV in this article. First, prepare the CSV file by filling in all of the information. When you have the final CSV file, import it into PowerShell to see if it is readable. As shown in the article, change the two lines in the Add-NewUsers.ps1 script. Run the script to add users to AD. The final step is to verify that the users were successfully created in Active Directory Users Computers.
Happy reading!! I hope you found this blog post helpful. If you have any questions, please let me know in the comment session.
- 标题: 如何批量创建AD用户
- 作者: 暗香疏影
- 创建于 : 2023-09-09 00:00:00
- 更新于 : 2023-09-09 00:00:00
- 链接: https://blog.pptcar.com/2023/09/09/Wiki-Guide/2023-09-09-create-bulk-ad-user/
- 版权声明: 本文章采用 CC BY-NC-SA 4.0 进行许可。