使用EGS创建vLLM推理服务并运行性能测试

我们下面教大家如何运行vllm大模型推理服务,这里以ECS带GPU的虚拟机(EGS)作为演示:
阿里云 - 使用vLLM镜像快速构建模型的推理环境
安装驱动和拉取vLLM镜像
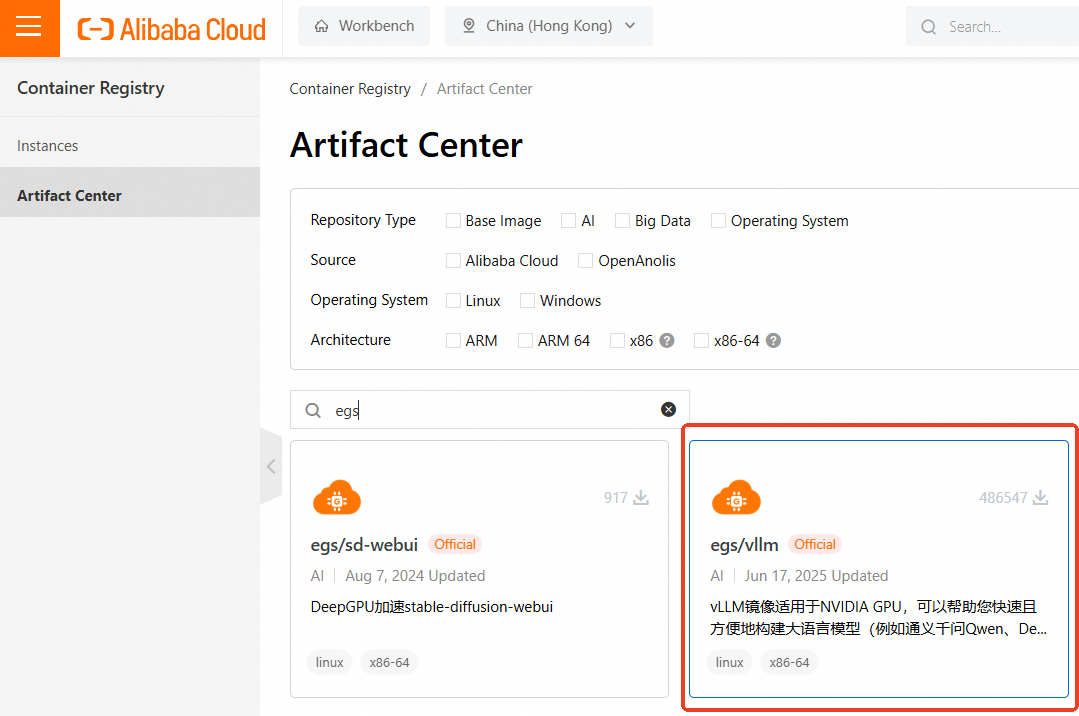
首先,我们需要拉取vLLM镜像,该镜像包含vLLM, CUDA, Pytorch等相关依赖。阿里云EGS本身有这个镜像,我们需要登录容器镜像服务控制台,然后在左侧导航栏,单击制品中心。
在仓库名称搜索框,搜索vllm或egs, 找到egs/vllm即可。也就是如下:
1 | egs-registry.cn-hangzhou.cr.aliyuncs.com/egs/vllm:[tag] |
阿里云还提供其他AI类镜像,例如ac2/vllm等,具体可以参考Alibaba Cloud AI Containers镜像列表
在创建ECS中,直接GPU实例上使用vLLM容器镜像,需要提前在该实例上安装Tesla驱动且驱动版本应为535或更高,建议购买GPU实例时,同步选中安装GPU驱动。
之后安装Docker,这里可以直接用linuxmirror安装docker。
然后安装nvidia-container-toolkit
1 | curl -fsSL https://nvidia.github.io/libnvidia-container/gpgkey | sudo gpg --dearmor -o /usr/share/keyrings/nvidia-container-toolkit-keyring.gpg \ |
设置Docker开机自启动并重启Docker服务
1 | sudo systemctl enable docker |
拉取vLLM镜像
1 | # docker pull <vLLM镜像地址> |
运行vLLM容器
1 | sudo docker run -d -t --net=host --gpus all \ |
然后docker ps查看状态
运行模型
本测试以Qwen3-0.6B模型为例,展示使用vLLM的推理效果。
执行以下命令,安装git-lfs便于下载大语言模型。
1 | apt install git-lfs |
执行以下命令,下载modelscope格式的Qwen3-0.6B模型。外国区域可以直接Huggingface。
1 | # git lfs clone https://www.modelscope.cn/Qwen/Qwen3-0.6B.git |
执行以下命令,进入vLLM容器。
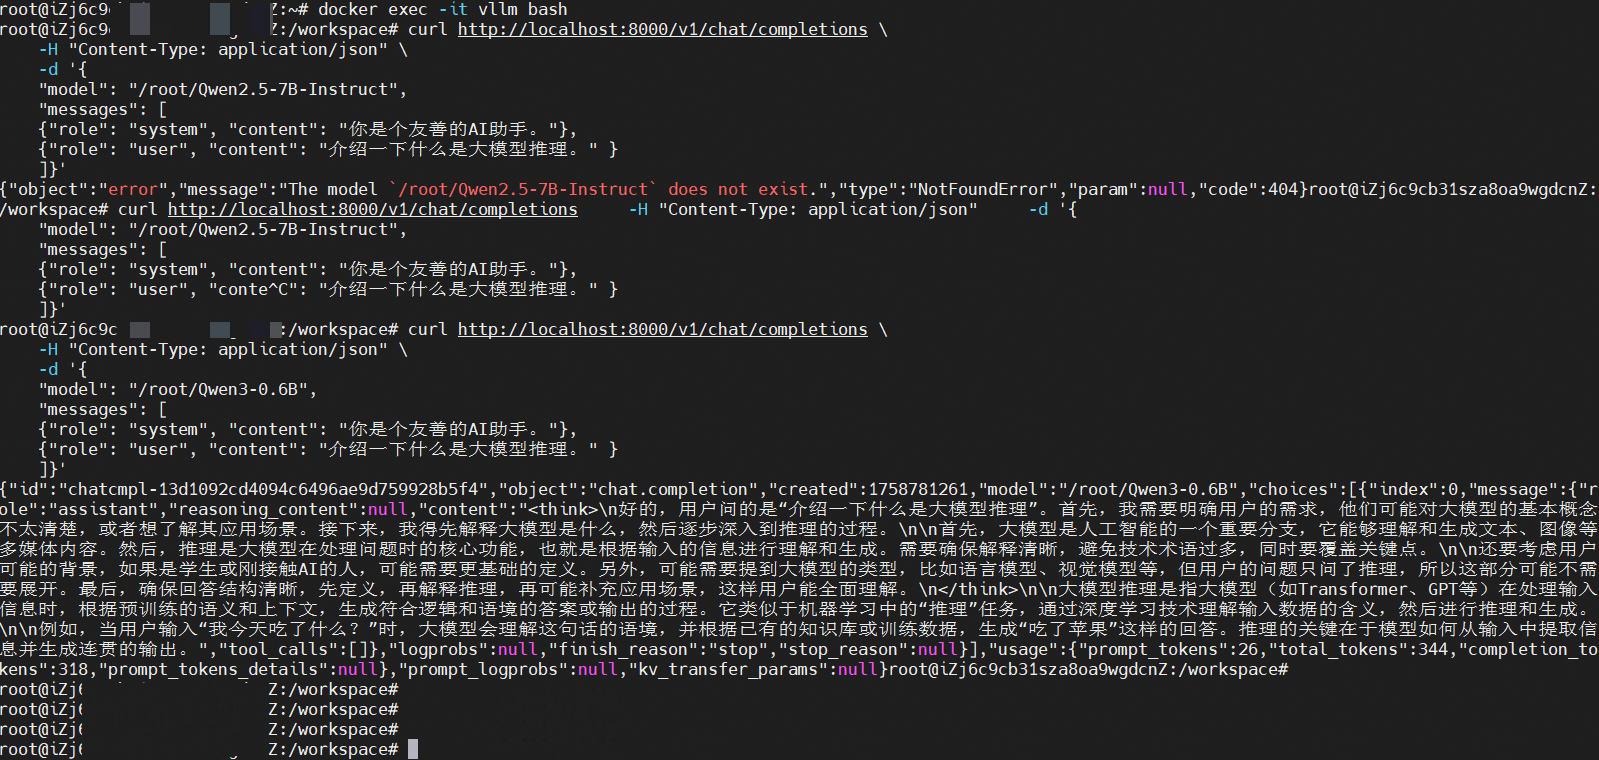
1 | docker exec -it vllm bash |
测试vLLM的在线推理测试效果
执行以下命令,启动vLLM推理服务
1 | python3 -m vllm.entrypoints.openai.api_server \ |
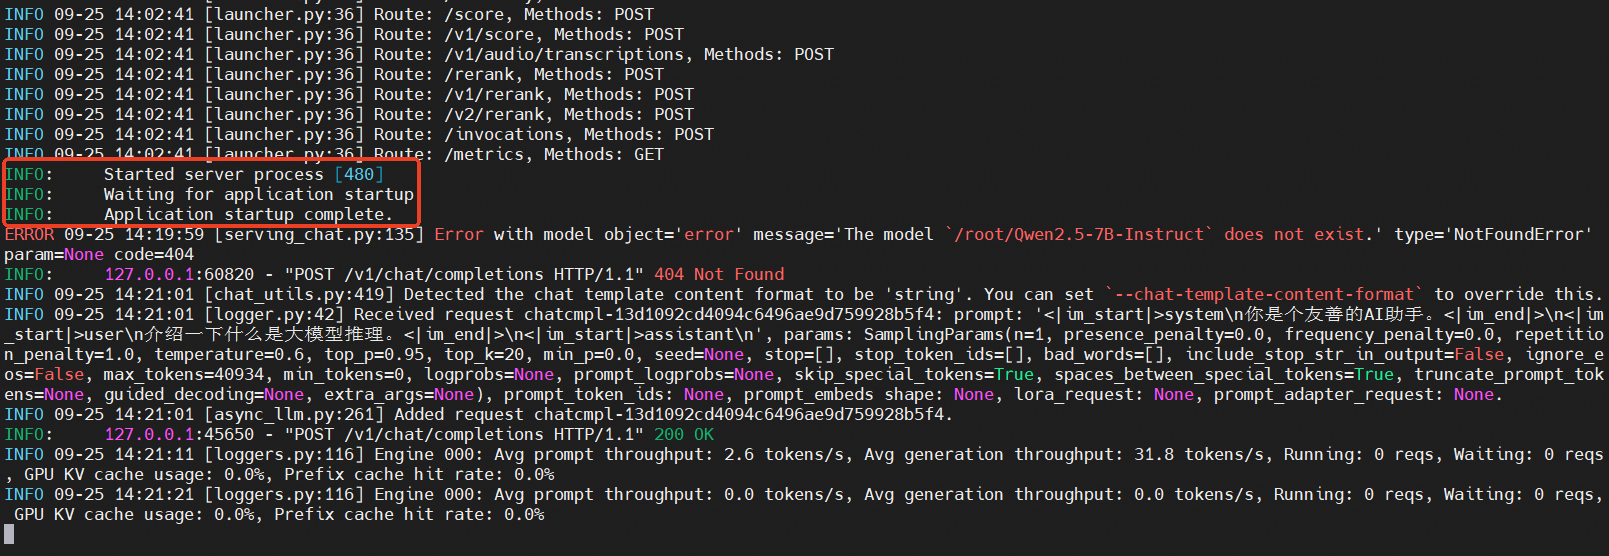
只需要看到Application Startup Complete,则说明vLLM服务启动成功。我们在另一个SSH里面进入容器后执行以下命令,测试推理效果。
1 | curl http://localhost:8000/v1/chat/completions \ |
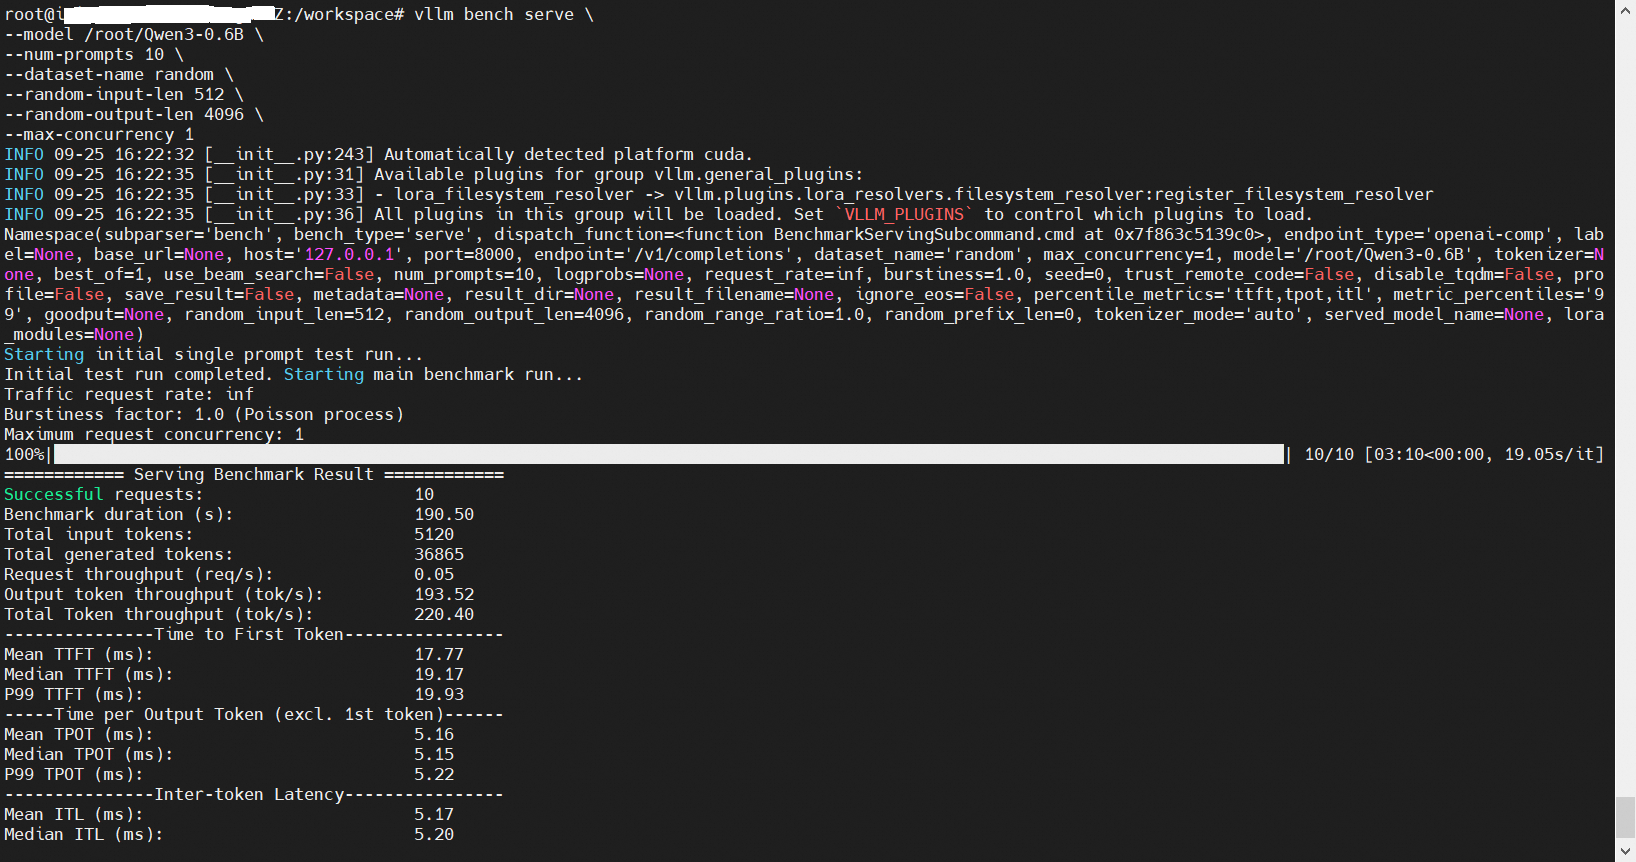
性能测试
1 | git lfs install |
进入容器后运行
python3 /root/vllm/benchmarks/benchmark_serving.py的方式已经不支持,只支持vllm bench serve的方式,且不支持ShareGPT。
1 | vllm bench serve \ |
我还继续保留以前使用的老命令用于参考:
1 | pip install pandas datasets && |
本次教程结束。
vLLM基础
使用并创建vllm容器镜像
1 | sudo docker run -d -t --net=host --gpus all \ |
安装pytorch
官网有安装命令指导:https://pytorch.org/get-started/locally/?ajs_aid=f57af34c-85d7-41ce-9ab4-b66c4cd82442
1 | pip3 install torch torchvision |
先用linuxmirror重置ubuntu源,然后安装vim
测试安装是否成功
1 | # 创建文件test.py |
更高级做法:
或者 python -c “import torch; print(‘PyTorch Version:’, torch.version)”
1 | import torch |
然后python3 test.py即可获得如下展示
1 | PyTorch Version: 2.8.0+cu128 |
检查vLLM版本
1 | python -c "import vllm; print('vLLM Version:', vllm.__version__)" |
1 | vllm serve /root/Qwen3-0.6B --trust-remote-code --tensor-parallel-size 1 |
安装uv和vllm
1 | curl -LsSf https://astral.sh/uv/install.sh | sh |
1 | uv venv --python 3.12 --seed |
下次docker登录容器后,需要source .venv/bin/activate激活该环境。
- 标题: 使用EGS创建vLLM推理服务并运行性能测试
- 作者: 暗香疏影
- 创建于 : 2025-09-26 10:00:00
- 更新于 : 2025-09-27 09:09:00
- 链接: https://blog.pptcar.com/2025/09/26/2025-09-26-Using-EGS-vLLM-benchmark/
- 版权声明: 本文章采用 CC BY-NC-SA 4.0 进行许可。